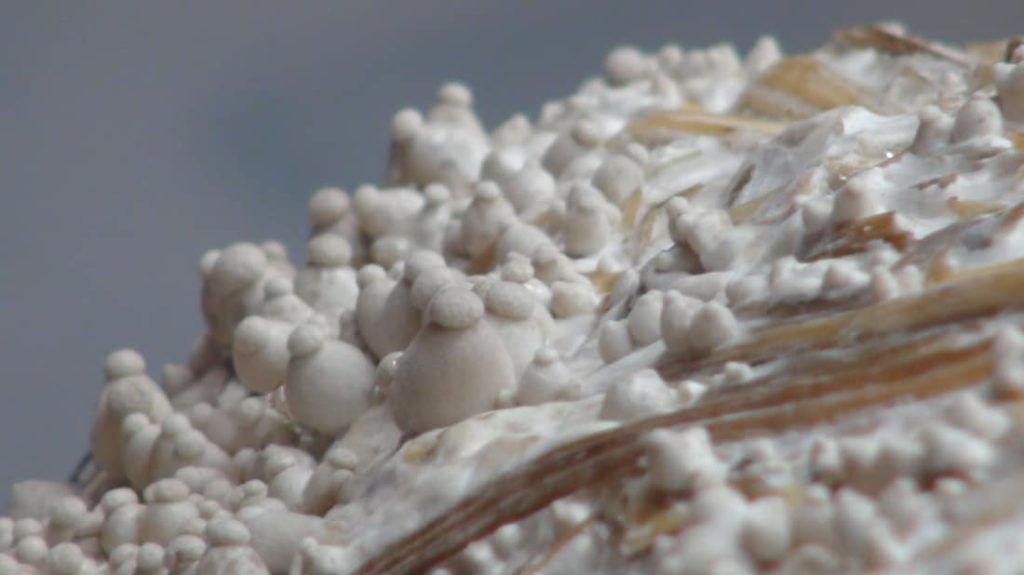
Straw makes a good substrate because it is both nutritious and easy to break down. Cereal straws such as wheat or rye are best.
Many different types of mushrooms will grow on straw, but the most rewarding type to grow is oyster mushrooms. They are easy to grow, colonize fast, and fruit heavily.
Oyster mushrooms come in many different forms including blue, pink, yellow, pearl, and king oysters.
- Blue Oysters will colonize in straw quickly and fruit heavily but require a lot of fresh air in order to develop large meaty caps. This makes them best suited for outdoors where there is unlimited fresh air. They prefer cooler weather and are generally suited to more temperate climates.
- Yellow Oysters do not require nearly as much fresh air as blues and are thus well suited for growing indoors. They are a tropical species and will grow fine at room temperature. The yield will be smaller than other varieties as this mushroom produces light and delicate- but beautiful- bouquets of vibrantly yellow mushrooms.
- Pink Oysters are incredibly fast to fruit, usually ready for harvest within 10-12 days of making the straw log. They are heat tolerant and don’t require much fresh air. The spore load can be quite heavy with these mushrooms requiring a keen eye for the right time to harvest.
- King Oysters will grow well on straw, but look notably different than other varieties. They may take a little longer to fruit as well. This species tends to produce large individual mushrooms rather than clusters. If grown inside they will tend to have large stems and small caps, while outside grows to produce large caps and very little stem. Both forms are desirable.
Step by Step guide on how to grow mushrooms using straw
Step 1
Choose the mushroom species you want to grow. The best species to grow is the oyster mushrooms
Oyster mushrooms come in many different forms including blue, pink, yellow, pearl, and king oysters.
- Blue Oysters will colonize in straw quickly and fruit heavily but require a lot of fresh air in order to develop large meaty caps. This makes them best suited for outdoors where there is unlimited fresh air. They prefer cooler weather and are generally suited to more temperate climates.
- Yellow Oysters do not require nearly as much fresh air as blues and are thus well suited for growing indoors. They are a tropical species and will grow fine at room temperature. The yield will be smaller than other varieties as this mushroom produces light and delicate- but beautiful- bouquets of vibrantly yellow mushrooms.
- Pink Oysters are incredibly fast to fruit, usually ready for harvest within 10-12 days of making the straw log. They are heat tolerant and don’t require much fresh air. The spore load can be quite heavy with these mushrooms requiring a keen eye for the right time to harvest.
- King Oysters will grow well on straw, but look notably different than other varieties. They may take a little longer to fruit as well. This species tends to produce large individual mushrooms rather than clusters. If grown inside they will tend to have large stems and small caps, while outside grows to produce large caps and very little stem. Both forms are desirable.
Step 2
You'll need:
- Straw (enough to fill at least a few medium-sized plastic bags)
- Wood chipper or lawnmower
- Propane burner, wood-fired oven, or other consistent heat sources
- 55 gallon drum or other large, food-grade container (CLEAN! Not one used to store anything toxic at any point)
- Large mesh basket or laundry bag
- Thermometer
Pasteurization occurs between 160 and 180 degrees Fahrenheit. Higher temperatures will result in you killing good bacteria and allowing the bad to bloom. With a water bath, you pasteurize by soaking the straw in 160-degree water for an hour.
Prepare your straw by cutting it into 1 to 3-inch pieces with your wood chipper or lawnmower.
Set up the container so it's sitting on top of your heat source. Fill it halfway with clean water.
Heat the water in the barrel until it stays between 160 - 170 degrees Fahrenheit. Use a long thermometer to measure the temperature.
Put the straw in the laundry or wire mesh basket. Submerge it in the hot water for one hour, monitor the water level and temperature. Put something heavy or a lid on top of it to keep it submerged.
After an hour, remove the straw and lay it on a clean table or plastic tarp to cool and drain. Make sure the straw has cooled to below 100 degrees before use.
Be sure to allow the straw time to drain and cool! If it's too hot it could kill your mycelium.
Step 3
Inoculation
You'll need:
- Pasteurized, cooled straw
- Mushroom spawn
- Food-grade plastic bags (I like oven bags)
- A clean nail or something sharp
- Twist ties
Lay the pasteurized straw out on a clean table or tarp. Break up your mushroom spawn into small pieces as you mix it into the straw, mix it thoroughly and evenly.
Fill each bag with the inoculated straw. Pack it well, but not so tightly that it's a compressed block. Try to squeeze as much air out of the top as you can before you twist the opening and secure it with a twist tie.
Poke holes on the sides of the bag every few inches. Mushrooms will grow out of those holes.
Step 4
Hang your bags in a cool, dark place so the mycelium can incubate. Between 60 to 75 degrees Fahrenheit is good for most species.
Check the moisture levels frequently if too dry mist some water a few times a day through the holes. Keep the straw moist, but not soggy.
Step 5
Initiate fruiting
After 2 to 8 weeks the mycelium will have colonized the whole bag. If this is noted, start initiating fruiting by exposing to some light (not direct sunlight) for several hours either via windows or artificial light.
Exposing the mycelium to room light is often enough to trigger fruiting with most species. Put them in a well-lit room so they get some indirect sunlight for at least 4 hours every day.
Step 6
Harvesting
Small mushrooms, the size of a pinky finger, will begin to grow. Let them grow and mature and they'll produce many times more in subsequent flushes (harvests).
It takes about two weeks for the crop to develop after initiating fruiting. Cut off individual mushroom caps when they're well-formed but still young and before the veil between the stem and cap opens up.
Step 7
After the mushrooms have been harvested, you can put out as many as 3 or 4 more flushes, that is until the bag stops producing mushrooms or mold has set in.

Conclusion
Growing mushrooms in straw is a relatively easy way to get started in mushroom cultivation.
Although there are other ways to grow mushrooms, this is one of the easiest and most straightforward methods. Straw can be grown indoors or outdoors depending on where you live.
This method doesn't use any fancy equipment or special conditions either, just heat, water, straw, and spawn.
Have you grown mushrooms in a straw before? What varieties have you grown, and how easy was it to grow them?
Feel free to leave any feedback or questions in the comments section below!

